
Creating a lip synched reel
I wanted to move on to creating a “reel” for posting to both Instagram and TikTok. The variables here are pretty confusing, but I at least wanted to create a short lip-synched video, put some type on it, and try to get the “Comment ‘Yes” and I’ll send you blah, blah, blah.”
This is more complicated than it sounds.
Step One – Creating the “Giveaway” Mini-Course
First, you need something to send them if and when comments start coming. I decided to do a short mini-course called “Learn the Ukulele Today”. This was intended to cover the basics to get a new uke player going after just one session. So the short video had to cover
1. An intro to the uke – how it works.
2. At least 3 chords for playing along with songs in the key of C.
3. Strumming intro. And
4. Access to some playalong songs indicating melody and including chords.
This required original footage where I explained and demonstrated each of these. There was nothing AI about doing this. I recorded separate segments using the Zoom record feature. This gave me video and audio. I then assembled these segments in Resolve giving me a completed video including overlays. This what I ended up with:
Step 2 – Creating the Character (Denise) for the Instagram/TikTok/Facebook post
I could have done this the same way as the above video, but I wanted to experiment further with creating a character, animating it, and lip-synching it to a script. What I was after was an attractive young female “instructor” holding a ukulele and extending it out as she talks and encourages people to comment. From previous attempts I know I could do the animation and lip-synching in dzine.ai. I had previously created one frame of a character in a specific setting, separately created an audio track and then combined them in dzine.ai.
But in this case I intended to create two frames using ChatGPT – an opener and a closer…
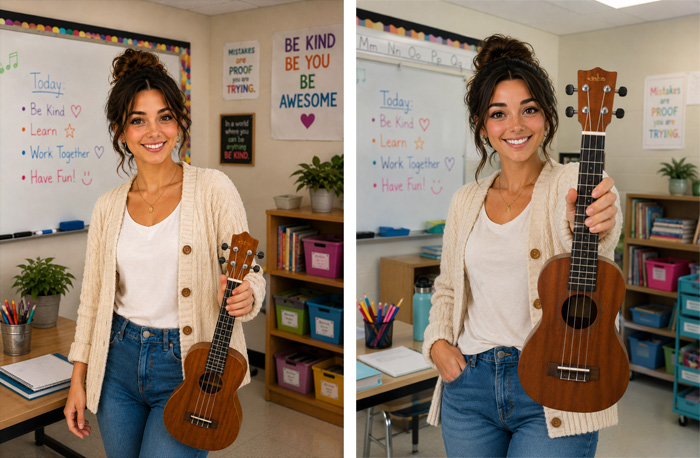
I had to experiment with these poses a bit. My initial opening frame had “Denise” holding the ukulele. But when I animated them in dzine.ai it insisted on having her strum while she talked. This happened with a previous attempt, so, as before, I simply had her hold the uke in one hand with no suggestion that she was playing it.
Step 3 – Animating and Adding the Audio
Then I took the frames to dzine.ai. The steps there were relatively straightforward, but doing this a dozen times or so would make it more intuitive. First I had to create the 13 second animation. I had previously determined that the audio would be roughly 13 seconds. The process involves uploading the opening and closing frames and specifying the length of video required.
Once the video was animated satisfactorily it was time to lip-synch it. This involves entering the script (by typing it in like a prompt,) choosing a voice, and then having the voice lip synched to the animation.
This sounds both straightforward and potentially quite confusing. As I’ve said numerous times, doing it a dozen times or so helps.
Here is the finished product:
As you can see I added overlaid text, and could have added logos and other graphics. I kept it simple in this case. I could have done the overlays in Resolve, but Canva is a bit simpler so I used Canva to give me the finished 13 second video.
Step 4 – Creating the “Just Comment Yes” feature.
This is the feature that connects the viewers response to his/her receiving an automated response – which in this case is the link to the page containing the 13 sec. mini-course. Since I’m not quite sure I’ve figured this out yet I’ll wait until I do to report on that in the next post in this series.
Using ChatGPT to Create Logos

High Tech in Waterloo Region is Much More Than Blackberry

Enhancing a Real Image
About Author
